Analytical instrumentation
Heater Tube Deposit Rater
Mar 30 2011
The Jet Fuel Thermal Oxidation Test (JFTOT®) ASTM D 3241 is universally used by the industry to measure high temperature stability of aviation turbine fuels. The ASTM D3241 is required to be run on every batch of jet fuel produced according to ASTM D 1655 or DEF STAN 91-91 specifications. In this test method, the fuel is pumped through heater tube at fixed flow rate and during a specified period of time. The fuel is pass or fail rated according to the amount of deposit formed on the heater tube at specified temperature.
Traditionally the amount of deposit on the tube is rated visually by the operator against reference color scale. The proper rating requires significant experience and expertise. But, operator capabilities vary, so evaluation of colour can be quite subjective.
Many articles have been published on the fact that color does not provide real information on the thickness and volume of deposits, parameters which are far more meaningful for characterizing jet fuels for users and suppliers.
The aviation fuel industry found that one of the most crucial stage of this test method is an objective analysis of deposit produced on the heater tube.
A new instrumental method of quantitative measurement of tube deposits has been developed by AD Systems (France), in which the thickness of the deposit is accurately determined by an automatic instrument, reducing test subjectivity.
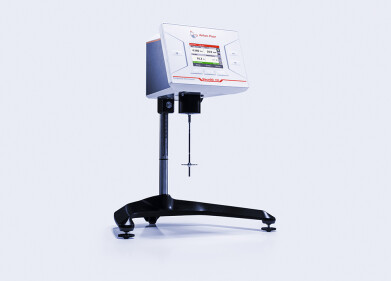
The innovative DR 10 instrument uses an interferometry technique for precise measurement of deposit thickness in nanometers range. This stand alone compact instrument can be easy installed at any location ideal for workflow. The operation is based on a powerful light source, a spectrometer with a fiber optic probe, and specially designed application software.
The DR 10 test is simple and straightforward. The heater tube is prepared according to ASTM D 3241 test procedure and is then placed in the test chamber of the DR10. Using intuitive graphical interface with touch screen panel, the operator enters sample information and starts a tube scan. Specific light is emitted on the surface of the heater tube. The reflected light is collected and the interference created by the deposit is monitored by the spectrometer. The built-in software analyzes the interference fringes and calculates the deposit thickness. The mechanical system displaces the optical probe and rotates the heater tube taking precise thickness measurements at 1,200 points along and around its surface. A detailed test report is ready in less than 15 minutes.
The DR 10 test report provides a 3D profile of the deposit distribution on the tube surface. The software automatically detects and reports the Standard Spot value which is mean deposit thickness of the thickest 2.5 mm2 area as defined in the ASTM D 3241. In addition, the average and the maximum thickness deposit values, as well as the calculated total deposit volume are reported. For complete test traceability, the DR 10 report is tagged with the heater tube serial number picture taken by the built-in camera.
The DR 10 is a useful measurement tool for fuel research programs providing unique information on fuel deposit behavior at different oxidation temperatures and for the evaluation of antifouling additives efficiency.
Digital Edition
PIN 25.6 Buyers' Guide
January 2025
Buyers' Guide Directory - Product Listings by Category - Suppliers Listings (A-Z) Articles Analytical Instrumentation - ASTM D7042: The Quantum Leap in Viscosity Testing Technology -...
View all digital editions
Events
Jan 20 2025 San Diego, CA, USA
Jan 22 2025 Tokyo, Japan
Jan 25 2025 San Diego, CA, USA
SPE Hydraulic Fracturing Technology Conference and Exhibition
Feb 04 2025 The Woodlands, TX, USA
Feb 05 2025 Guangzhou, China


